How to Change the PHP Version in XAMPP Windows
HTTP error 500 is a server-side error that occurs when the server encounters an unexpected condition that prevents it from fulfilling the request made by the client. The error is often caused by a problem with the PHP configuration or code. Upgrading or downgrading the PHP version in XAMPP helps resolve HTTP error 500 if the error is caused by an incompatibility issue between the PHP version and the application or framework you are using.
if your application requires PHP version 7.2, and you have installed PHP version 8.0 in XAMPP, downgrading the XAMPP PHP version to 7.2 or any PHP version with 7,0 to 7.9 can help ensure that your application runs smoothly without encountering HTTP error 500. However, if your application is set to use a newer PHP version then your local host in XAMPP should be configured with the latest version of PHP
Also Read :
Localhost is currently unable to handle this request HTTP Error 500
It’s important to note that when downgrading or upgrading the PHP versions, you should ensure that the new PHP version is not too old, as older PHP versions may have security vulnerabilities and compatibility issues with newer applications and frameworks. Therefore, using the latest compatible version of PHP for your application is recommended.
Steps to follow while upgrading or downgrading PHP Version in Xamp
1. Download the desired version of PHP from the official PHP website or trusted distributors. Make sure you download the thread-safe version for Windows or the intended operating system
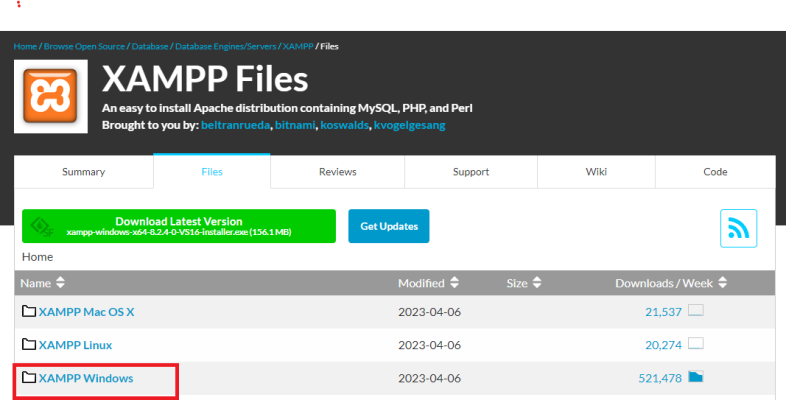
2. After clicking the XAMPP Windows option, navigate to portable XAMPP for Windows.
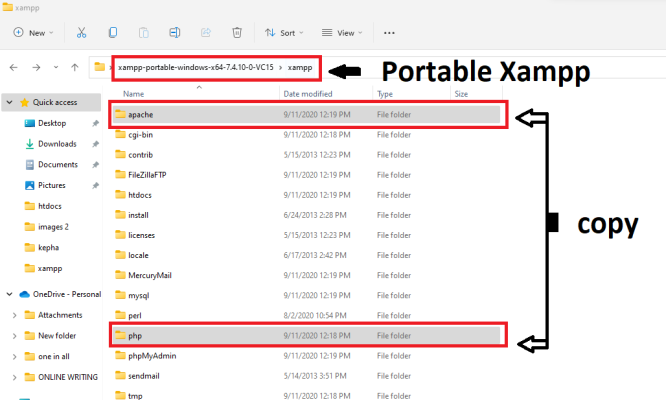
Portable XAMPP for Windows contains all the files needed to run a web server locally on your computer. It includes Apache web server, MySQL database, PHP, and Perl, as well as other utilities and libraries that are commonly used for web development. Here we are majoring in Apache and PHP files.
Portable XAMPP for Windows is a version of XAMPP that can be run directly from a USB flash drive or other portable storage device without the need for installation. This allows you to easily carry XAMPP with you and use it on any Windows computer without having to install it on each computer.
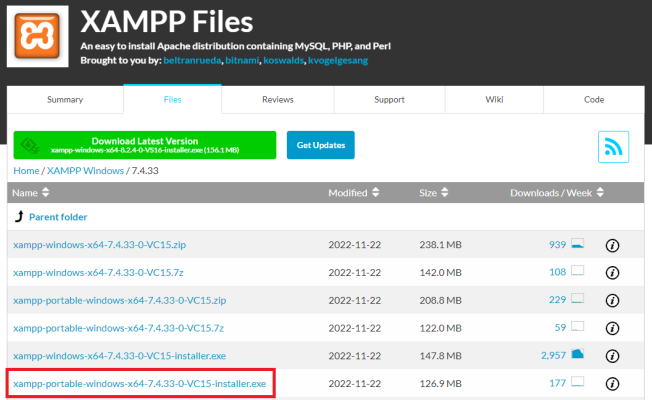
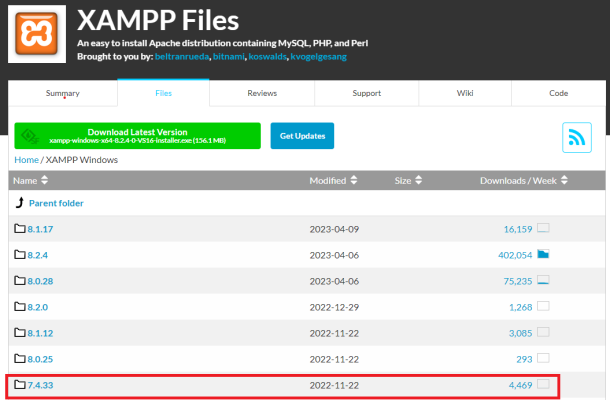
3. Choose the version of your XAMPP PHP version to download. However, we will be downgrading the PHP Version of Xamp from 8.2 to 7.4.
Copy and Paste to Apache and PHP folder
4. Open the Portable XAMPP zip file downloaded and extract the files to a folder. Navigate to the XAMPP and locate the Apache and PHP folders. These are the files we need to copy and paste to the XAMPP folder installed in your computer ie C:\xampp
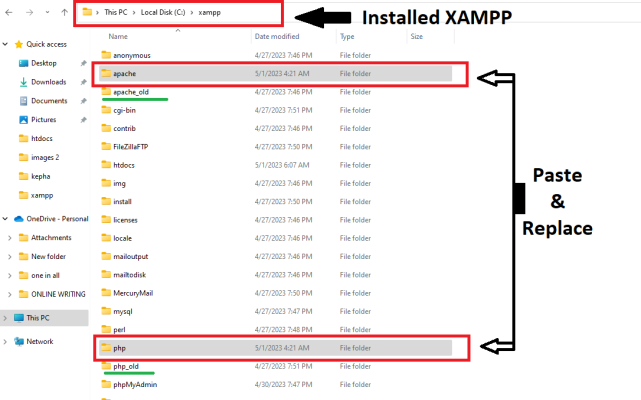
5. Navigate to the XAMPP folder installed in your computer ie: C:\xampp. Rename the Apache folder to Apache _Old and the PHP folder to PHP_Old or to anything else. Alternatively, you can paste and replace the Apache and PHP files copied from the portable XAMPP
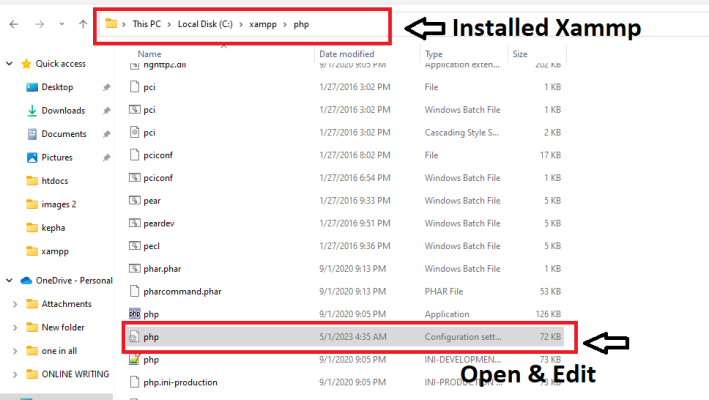
6. Open the new PHP Folder pasted in the installed folder of XAMPP ie: C:\xampp\php and Locate the PHP.ini configuration setting to modify and update the include_path and the extension_dir
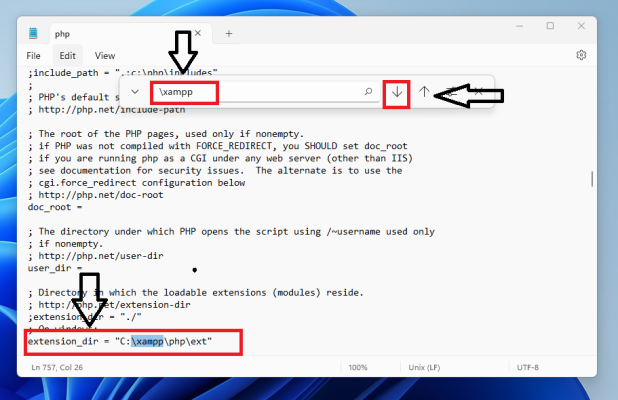
To update the include_path and the extension_dir, open the PHP.ini configuration file with a text editor. While in the test editor, use the command CTRL+F to open the search bar. Locate the “extension_dir” and include_path line inside the new PHP directory. For example, if the new PHP directory is C:\xampp\php, the extension_dir line should be set to “C:\xampp\php\ext”
Type and search the ” \Xampp” in the search bar to locate the include_path=\xamp\php\PEAR and change it to include_path= C:\xamp\php\PEAR
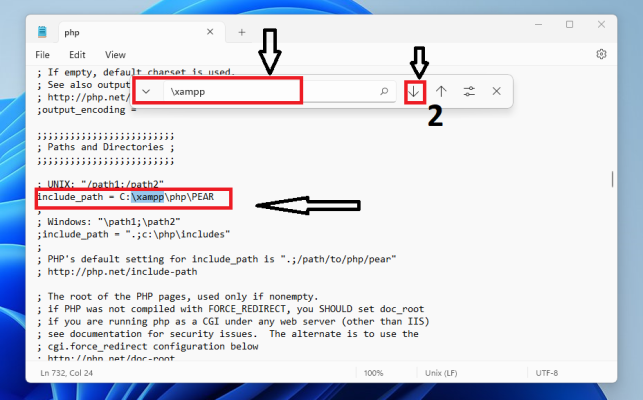
Scroll using the down arrow to locate the extension_dir and change it from extension_dir = “\xamp\php\ext” to extension_dir = “C:\xamp\php\ext”. Save the changes and close the text editor.
.


Leave a Reply