How to Install SSL certificate for free in WordPress website
How to Install SSL Certificate on WordPress Websites
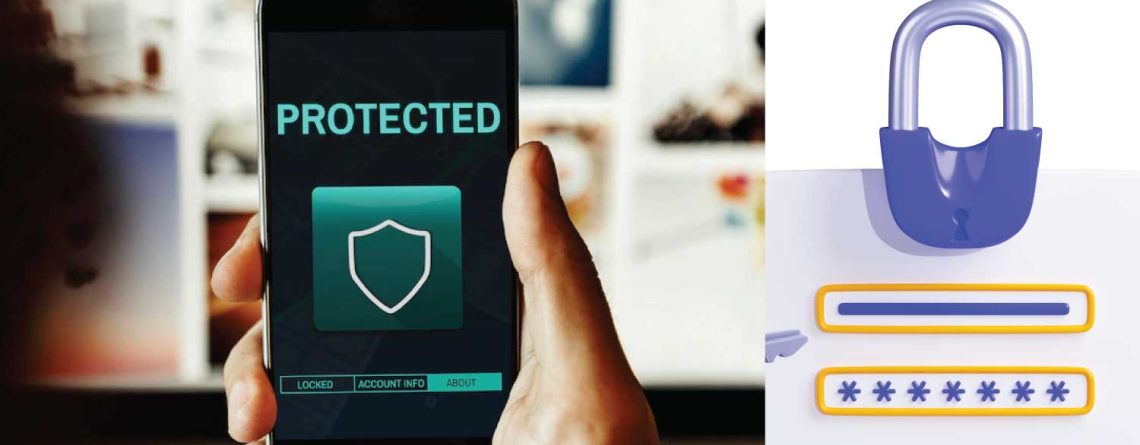
What is SSL?
SSL certificate, an acronym for Secure Sockets Layer, is a technology that enables secure communication over the Internet. By encrypting data transmitted between a website and its users, SSL ensures confidentiality and protects sensitive information.
When a user interacts with a website secured with SSL, their data undergoes encryption, rendering it unreadable to unauthorized parties. This encryption process establishes a secure tunnel for data transmission, preventing potential threats.
Additionally, SSL serves as a means of authenticating a website’s identity. Through digital certificates issued by trusted Certificate Authorities (CAs), SSL verifies the legitimacy and trustworthiness of the website.
Obtaining an SSL certificate involves generating a Certificate Signing Request (CSR) on the web server and submitting it to a reputable CA for validation. The CA verifies the domain’s authenticity and issues the SSL certificate upon successful validation. The certificate is then installed on the web server, configuring it to establish secure connections.
SSL plays a pivotal role in enhancing security, protecting user privacy, and instilling trust among website visitors. It enables secure e-commerce transactions, confidential data transfers, and safe browsing experiences. By encrypting sensitive information, such as passwords and credit card details, SSL ensures their privacy and security
How do you know that your website has SSL certificate security installed?
When you have installed an SSL certificate on your website, a sign of a locked padlock will appear before the URL.
HTTPS-encrypted websites are safe.
![]()
If a website’s connection is not secure, it will frequently display a warning message that says “Your Connection is not Private,” which is displayed to HTTP protocol users.
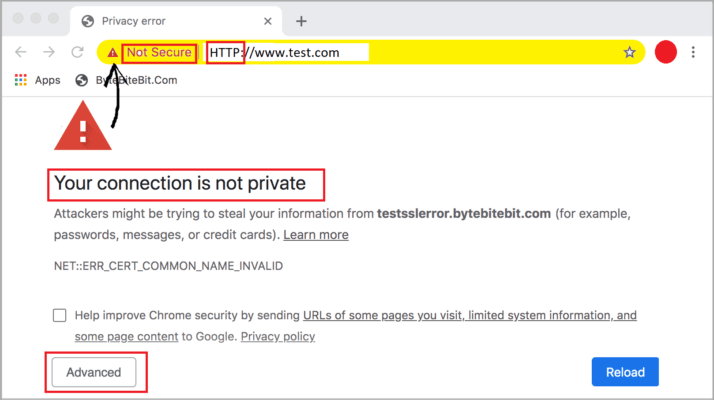
NB: To continue accessing the website using the HTTP protocol, click on the advanced button and proceed with the unsafe connection
Installing an SSL Certificate
An SSL certificate can be installed;
- From your Host
- Using a Plugin
- Third-Party
Installing a free SSL certificate using Let’s Encrypt from your host method
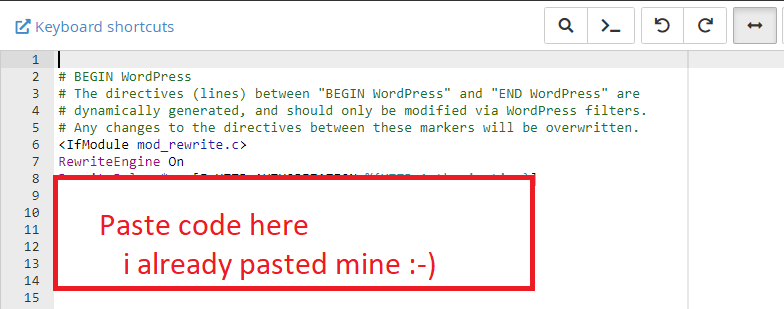
We first have to redirect the website link from HTTP to HTTPS protocol by editing and adding the following code to the .htaccess file in your cpanel.
RewriteEngine On
RewriteCond %{HTTPS} off
RewriteRule ^(.*)$ https://%{HTTP_HOST}%{REQUEST_URI} [L,R=301]
Log in to your control panel/cPanel and navigate to File Manager,
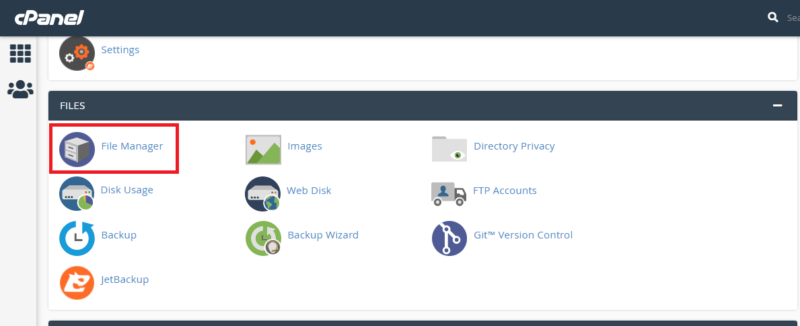
Go to public HTML to locate the .htaccess file. (File Manager >> Public_html >> .htaccess)
Right-click on the .htaccess file to edit this file
Sometimes the .htaccess file may be hidden in the public_html folder. To show this file, click on settings at the top right of your panel, navigate and select ‘show hidden files’, and save.
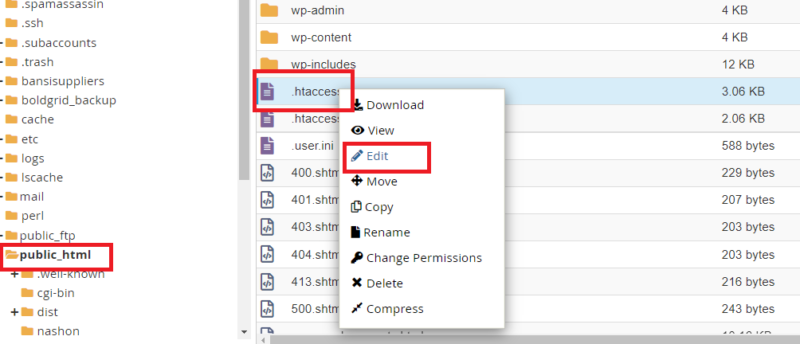
Paste the code following code at the top of the .htaccess file.
RewriteEngine On
RewriteCond %{HTTPS} off
RewriteRule ^(.*)$ https://%{HTTP_HOST}%{REQUEST_URI} [L,R=301]
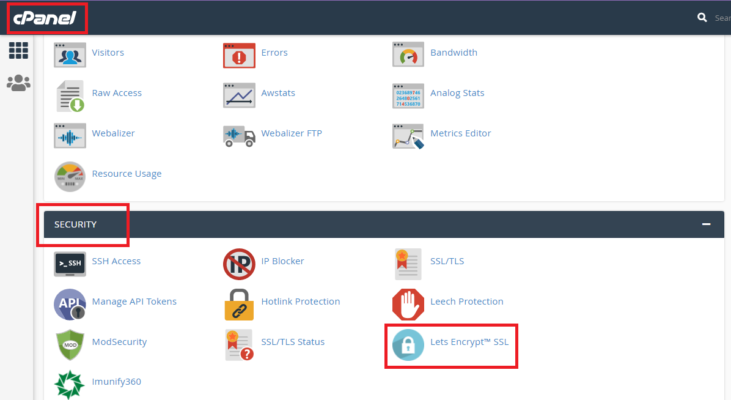
Log in to your control panel/ cPanel where you are hosting your website and navigate to the security section and choose to click “Let’s encrypt” (cPanel >> Security >> Let’s encrypt)
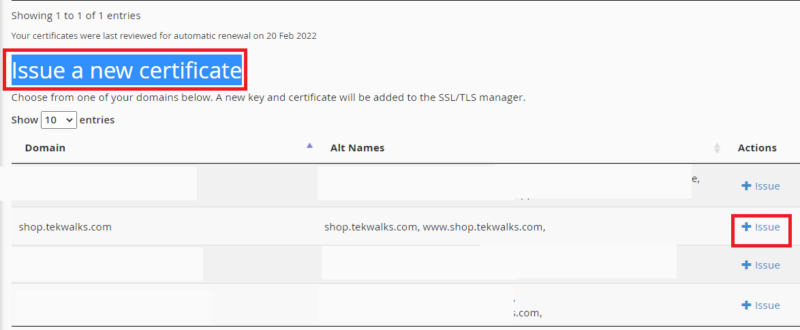
Navigate to the Issue a new certificate section and identify the particular domain you want to assign the encryption to. In front of the domain, click on “issue”
(cPanel >> Security >> Let’s encrypt >> Issue).
Click on the ‘Add cPanel subdomains**? To select the option as shown below, click on the save option.

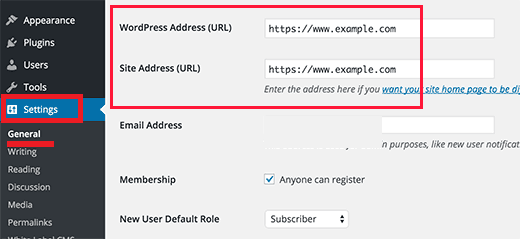
After successfully saving the changes, navigate to the WordPress admin dashboard to change the URL links from HTTP to HTTPS and click the save button to keep the changes
If you need help with the WordPress website, feel free to contact us, we are open to inquiries and help you grow your business as well as knowledge.
Also, Read :
Essential WordPress Security Measures to Protect Your Site From Hackers


Leave a Reply