How to Install Google Analytics in WordPress
How to Install Google Analytics in WordPress
Google Analytics is a valuable tool for businesses to gain insight into their website’s performance. It allows you to evaluate and measure the effectiveness of marketing strategies, content engagement, and product performance.
By collecting data and organizing it into meaningful information, Google Analytics provides valuable insights that can drive informed decision-making. With this tool, businesses can track key metrics, such as website traffic, user behavior, and conversion rates, to understand how visitors interact with their sites.
This data helps businesses identify strengths, weaknesses, and areas for improvement, ultimately leading to better user engagement and overall success. Google Analytics is a powerful resource that empowers businesses to optimize their online presence and make data-driven decisions for growth and profitability.
If you’re new to WordPress and want to harness the power of Google Analytics, this step-by-step guide will walk you through the installation process. By the end of this tutorial, you’ll have Google Analytics up and running on your WordPress website, ready to gather crucial data for informed decision-making.
Create a Google Analytics Account
To get started, head over to the Google Analytics website (analytics.google.com) and either sign in with your existing Google account or create a new one. Once you’re logged in, click on the “Start measuring” button and provide the necessary details to set up your analytics account.

Upon signing in with your Gmail account, you will encounter a welcome screen resembling the one depicted below. On this screen, you will have the opportunity to sign up for Google Analytics using your Gmail account. Proceed by clicking the ‘Start measuring’ button to commence the process.

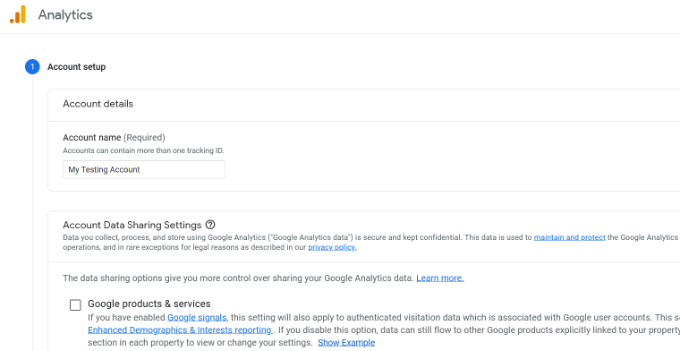
Once you have completed the previous steps, you will be prompted to enter an account name. This name is for internal use and can be chosen freely, such as using your business name or any other identifier.
Furthermore, Google Analytics provides options for multiple account data-sharing settings. These settings allow you to manage the sharing of your Google Analytics data. By default, the recommended settings are selected, and you can proceed to the next step without making any changes.
Set Up a Property
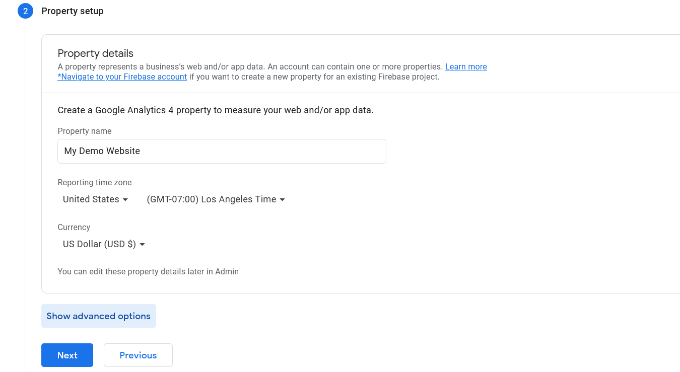
After navigating to the next screen, you will be prompted to create a Google Analytics property for your website. It’s important to note that Google has introduced a new version of Analytics called Google Analytics 4 (GA4), which combines tracking for both websites and mobile apps under the same account. GA4 offers new features, metrics, and a different interface for generating reports.
A critical point to consider is that if you already have a Universal Analytics account, it is crucial to begin tracking data in GA4 as well. This is because Google has set a sunset date for Universal Analytics, which is July 1, 2023. Once this date arrives, Universal Analytics will no longer receive any data and will eventually cease to function.
If you set up a GA4 property after the sunset date, you will be starting from scratch. However, there is a way to send data to GA4 while still using Universal Analytics. By doing so, you can have historical data in GA4 for comparison and analysis when Universal Analytics is no longer active.
To get started, enter a suitable property name and select your reporting time zone and currency. Once you’ve provided this information, click the ‘Next’ button to proceed.
Choose Industry category and Business Size
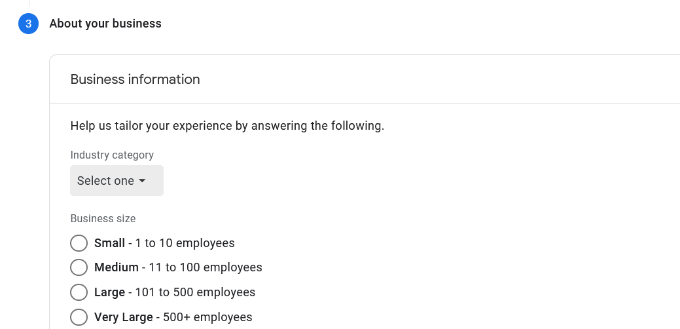
When setting up Google Analytics, you will be prompted to choose an industry category and business size for your website. On the following screen, you’ll find a dropdown menu where you can select the most appropriate industry category that aligns with your website’s niche or field.
This helps Google Analytics provide more relevant benchmarks and comparisons for your website’s performance. Additionally, you will be asked to select the business size that best represents your organization from the available options. This information aids in contextualizing your website’s data and allows for more accurate analysis and insights tailored to your specific industry and business scale.
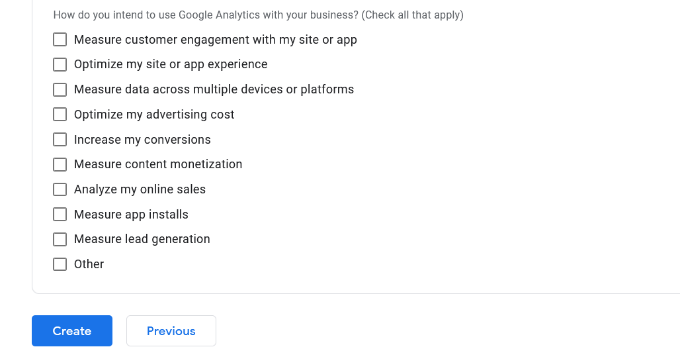
Afterward, scroll down the page and choose the specific purposes for which you plan to utilize Google Analytics for your business. These purposes may include measuring user engagement, optimizing advertising expenses, increasing conversion rates, and other relevant objectives.
Feel free to select multiple options or choose all the options that align with your requirements. Once you have made your selections, simply click on the ‘Create’ button to proceed.
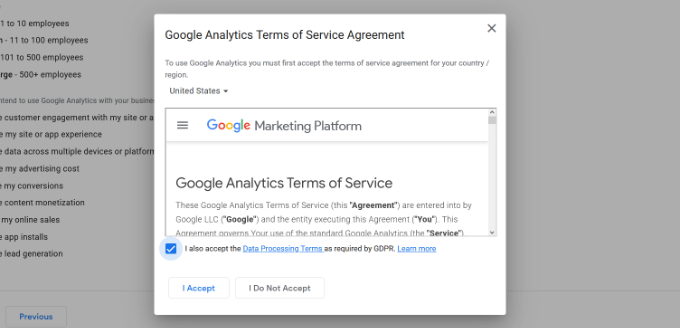
When you click on the “Create” button, a popup window will appear displaying the terms of service agreement for Google Analytics.
To proceed, check the box that says “I also accept the Data Processing Terms as required by GDPR” and then click the “I Accept” button.
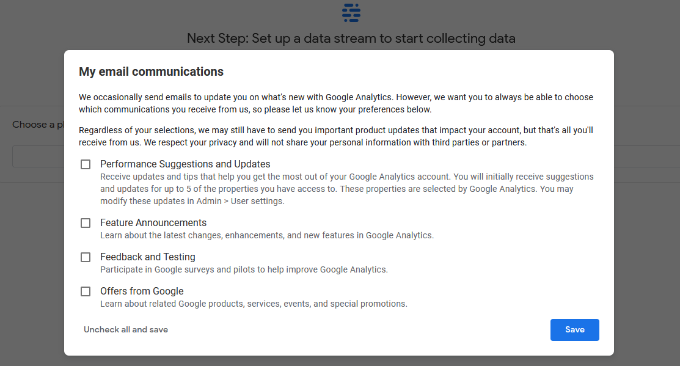
Afterward, a popup will appear, offering various options for the communication emails you wish to receive from Google Analytics. Select the checkboxes corresponding to the updates you desire, then click the ‘Save’ button to confirm your choices.
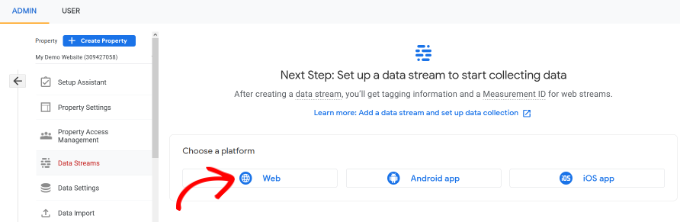
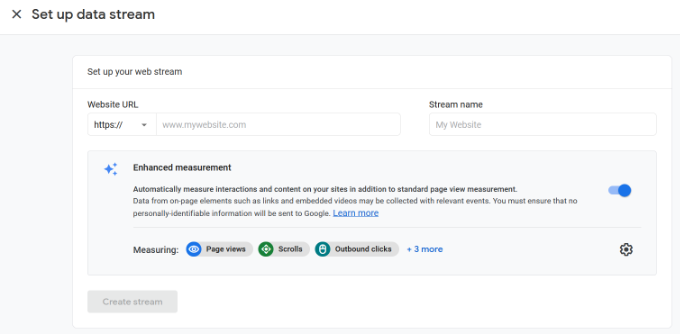
When setting up Google Analytics for your WordPress site, you will be presented with various options for your Google Analytics Web stream.
For our purposes, we will select the ‘Web’ option as the platform, as we are configuring Google Analytics specifically for a WordPress website.
Once you have completed the initial setup, the next step is to enter your website URL and Stream name in Google Analytics. It is important to note that by default, Google Analytics enables the Enhanced Measurement option. This feature allows you to track various user interactions such as page views, scrolling behavior, outbound clicks, and file downloads within the Google Analytics platform. To proceed, simply click the ‘Create stream’ button, and you’ll be on your way to unlocking valuable insights about your website’s performance.
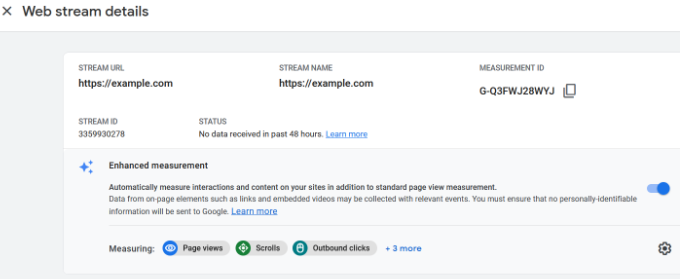
Once you have set up Google Analytics, you will be able to view essential information such as your Stream URL, name, and Measurement ID. Additionally, the platform provides insights into various enhanced measurements that it records, giving you a comprehensive understanding of your website’s performance. These enhanced measurements cover a wide range of metrics and data points, allowing you to delve deeper into user behavior and engagement.
In addition, Google Analytics provides various methods for adding the tracking code to your WordPress website, which can be found in the ‘Tagging Instructions’ section.
If you choose the ‘Global site tag (gtag.js)’ option, you will be presented with the Google Analytics tracking code.
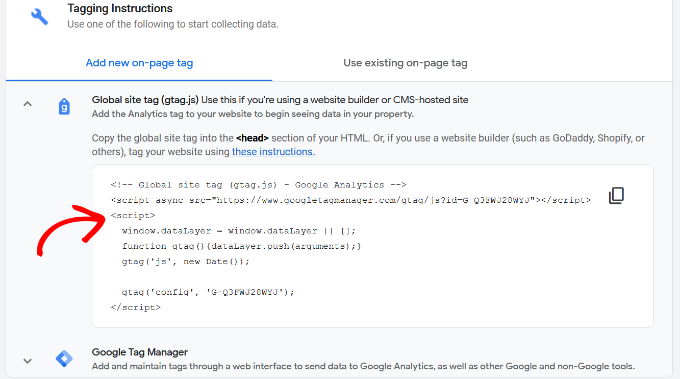
To install Google Analytics in WordPress, you’ll need the tracking code provided by Google. You can copy this code and keep it handy for the installation process. Alternatively, you can leave the Google Analytics browser tab open, allowing easy access to the code when you need it.
Now that you have successfully set up your Google Analytics account, let’s proceed with the installation process on your WordPress site.


Leave a Reply