
How to Increase the PHP Memory Limit in WordPress – Fixed
The PHP memory limit plays a crucial role in the smooth functioning of your WordPress website. It determines the memory allocated to PHP scripts, allowing them to execute tasks efficiently. You may encounter memory-related errors when dealing with resource-intensive plugins or complex operations. Increasing the PHP memory limit can help mitigate such issues and optimize your WordPress site’s performance. In this tutorial, we will explore How to Increase the PHP Memory Limit using cPanel,
The default setting for the PHP memory limit is 128 MB. However, it can be changed to suit the demands of your application. The most popular place to change the PHP memory limit is the php.ini file. However, it is possible to modify it programmatically using the ini_set() function or through cPanel by visiting the MultiPHP INI Editor.
This article will explore two approaches to increasing the PHP memory limit in a WordPress website.
-
Using the Cpanel MultiPHP INI Editor
-
Editing PHP memory Limit via a php.ini file
Also read
Types of website errors and how to troubleshoot them.
How to Increase the PHP Memory Limit from Cpanel
Access cPanel
Log in to your hosting account.
Locate and access the cPanel dashboard provided by your hosting provider.
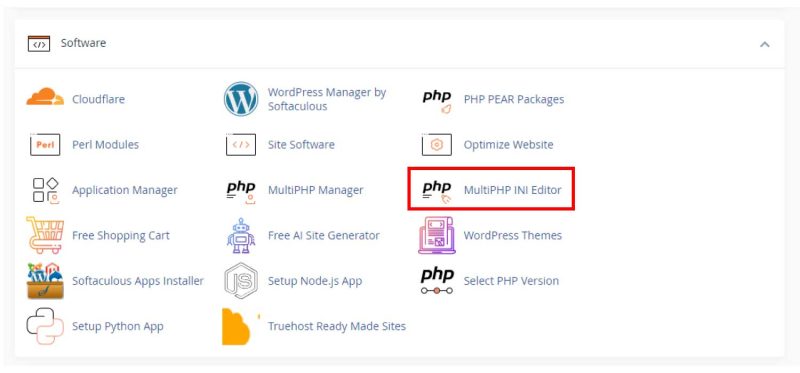
PHP Configuration section
Locate the Software section in your Cpanel, and choose MultiPhP INi Editor.
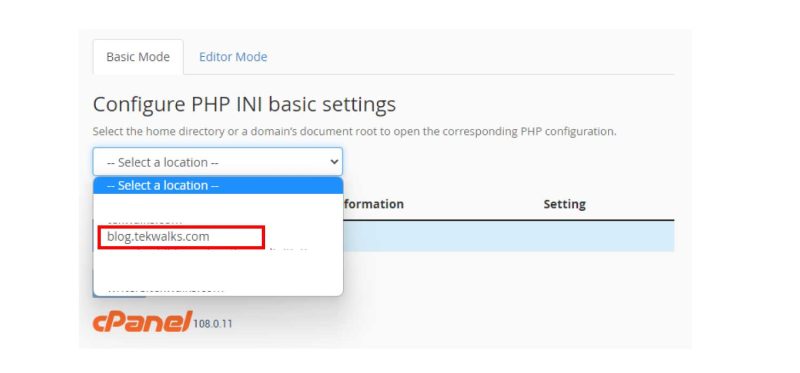
Editing Memory Limit using MultiPHP INI Editor
Editing the memory limit in the cpanel from the MultiPHP INI Editor can be completed in two options.
- Using the Basic mode
- Using the Editor Mode
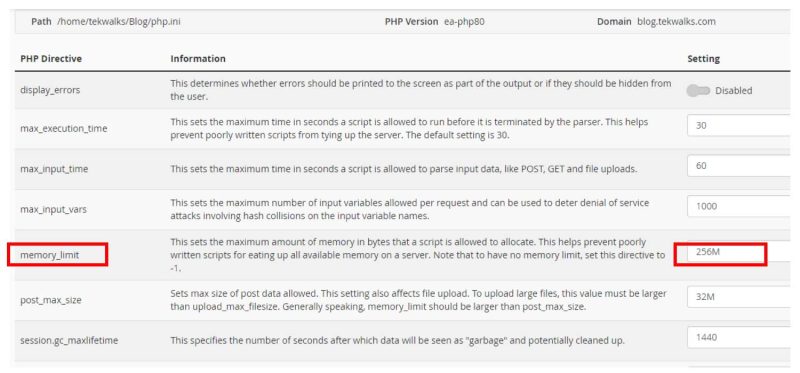
Using the basic mode, the user is provided with a user-friendly mode to edit and make changes in the domain php Limit Memory. However, Using the Editor Mode, users have to interact with code-based interphase, which we will also be giving a step-by-step guide in this article.
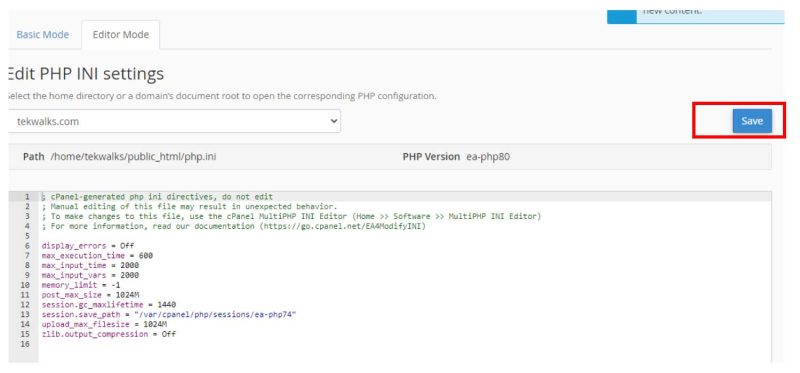
max_execution_time = 600
max_input_time = 2000
max_input_vars = 2000
memory_limit = 500M
post_max_size = 500M
Using the Editor Mode
How to Increase the PHP Memory Limit by using PHP.ini
The PHP memory limit is an essential configuration setting that determines the memory allocated to PHP scripts on your web server. You may encounter memory-related errors in PHP in certain situations, such as running memory-intensive applications or plugins. Increasing the PHP memory limit can help address these issues and ensure smooth operations. This tutorial will explore how to increase the PHP memory limit using the PHP.ini file.
WordPress is a widely used content management system (CMS) that powers millions of websites around the world. It is built using PHP, a server-side scripting language designed for web development. PHP (Hypertext Preprocessor) is a versatile and powerful language that allows developers to create dynamic and interactive web pages.
Locate the PHP.ini File
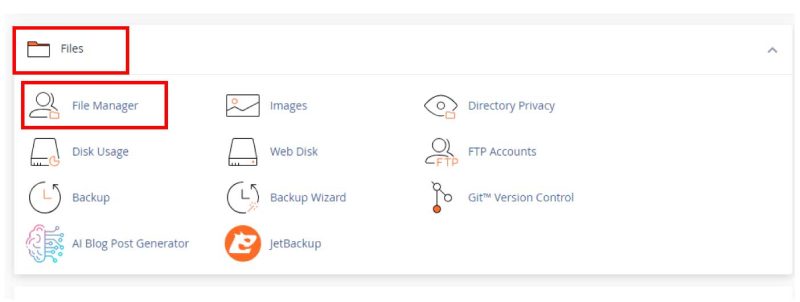
Access your cPanel and navigate to file manage to access the root directory files of your website.
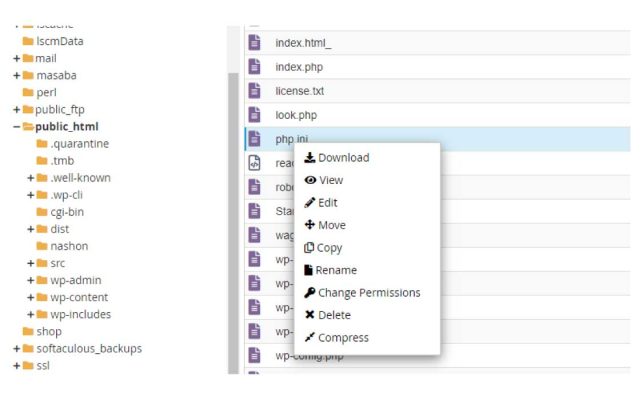
Locate the PHP.ini file in your website server; root file directory; public_html >>php.ini. If you can not find the file, then you will have to create a new file and name it PHP.ini. Right click to edit the PHP.ini file.
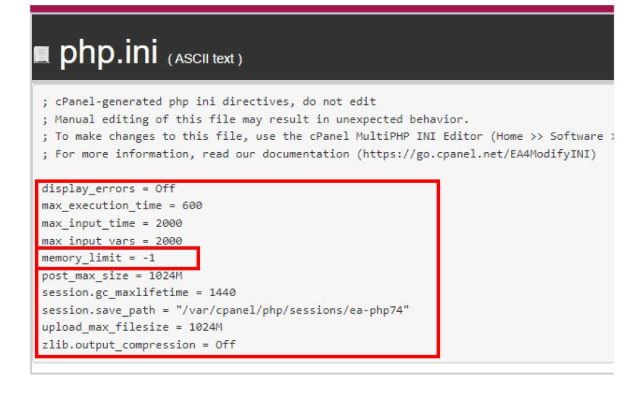
Edit the php memory limit and save. If you are unsure about the values to input, please use the below values. However, you can set the maximum memory limit to -1, which means your resources will have an unlimited memory limit. Ensure to save changes before exiting.
max_input_time = 2000
max_input_vars = 2000
memory_limit = 500M
post_max_size = 500M
Other related Server Errors due to limited PHP resources
- WordPress Memory Limit Error.
- Uploaded File Exceeds the upload_max_filesize Directive in php. ini.
- Fatal Error: Maximum Execution Time Exceeded
- Error 500


Leave a Reply