
How to Install WordPress website from cPanel
A Beginner’s Guide: Step-by-Step Tutorial on How to Install WordPress Website from cPanel
Are you a beginner looking to create your own website? WordPress is an excellent platform to start with due to its user-friendly interface and extensive customization options. In this step-by-step tutorial, we will guide you through the process of installing WordPress from cPanel, a popular web hosting control panel. By the end of this guide, you’ll have your very own WordPress website up and running.
Also, read :
- How to Install WordPress on Bluehost
- How to Install WordPress on Hostinger
- How to Install WordPress on Namecheap
- How to Install WordPress on Truehost
WordPress has become one of the most popular content management systems (CMS) in the world, empowering millions of websites. With its user-friendly interface and extensive customization options, WordPress makes website creation and management accessible to users of all levels of expertise. In this blog post, we will walk you through the process of installing a WordPress website from cPanel, a widely used hosting control panel.
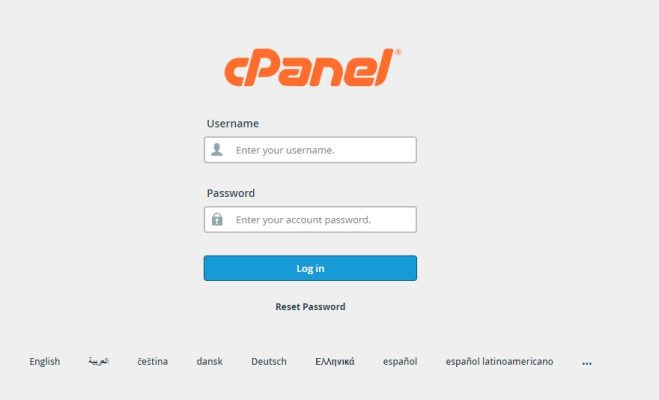
Step 1: Accessing cPanel
Log in to your web hosting account and locate the cPanel section to get started. Usually, you can access cPanel by appending “/cpanel” to your domain name (e.g., www.yourwebsite.com/cpanel). Enter your username and password to log in.
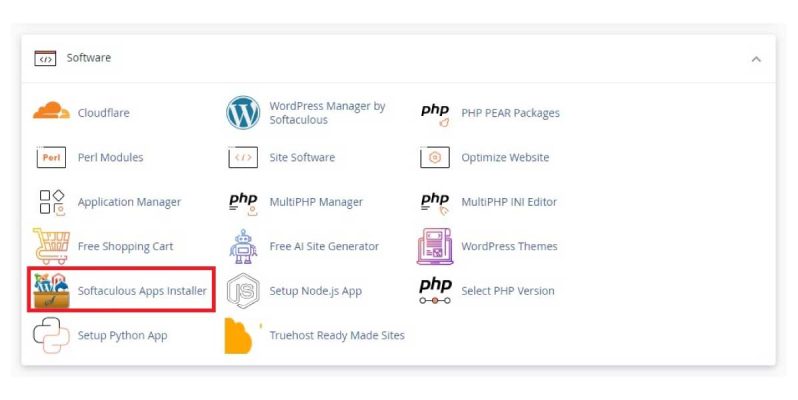
Step 2: Locating the WordPress Installer
Once inside cPanel, navigate to the “Software” or “Web Applications” section. Look for an application installer like Softaculous or Fantastico. These tools simplify the installation process by automating the setup for various applications, including WordPress. Click on the installer icon to proceed.
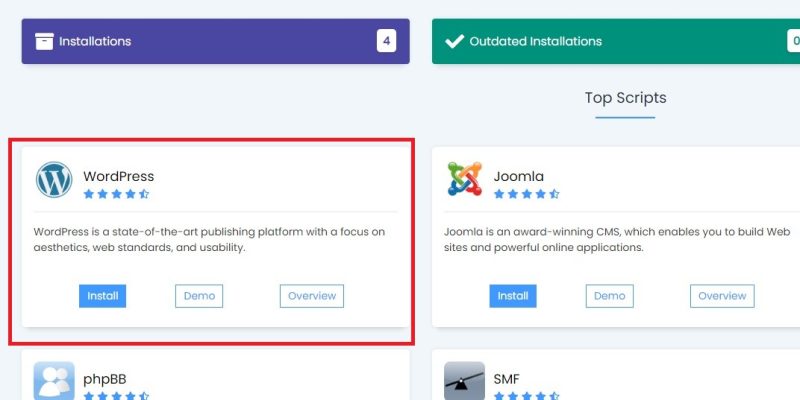
Step 3: Initiating the WordPress Installation
Thereafter, initiate WordPress installation. Within the installer interface, search for WordPress or locate its icon. Click on it to start the installation process. You will be directed to the WordPress installation page.
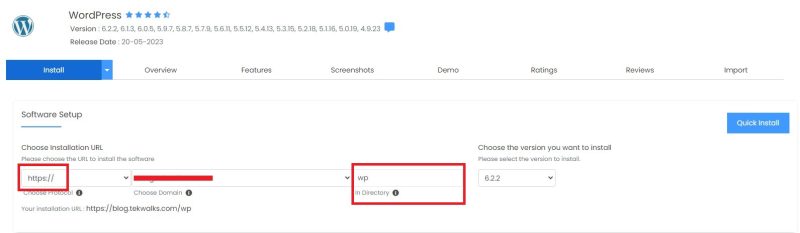
Step 4: Configuring Installation
Configure Settings On the installation page, you need to configure several settings for your WordPress website:
- Choose Protocol: Select either “http://” or “https://” depending on your website’s SSL certificate status. If you have an SSL certificate installed, it is recommended to choose “https://” for a secure connection.
- Choose Domain: If you have multiple domains associated with your hosting account, choose the domain where you want to install WordPress.
- In Directory: Leave this field blank if you want WordPress to be installed directly on your domain (e.g., www.yourwebsite.com). By default, WordPress writes the files in the “wp” folder, you will have to delete this “wp” and leave the directory black. If you want it to be installed in a subdirectory (e.g., www.yourwebsite.com/blog), enter the desired directory name.
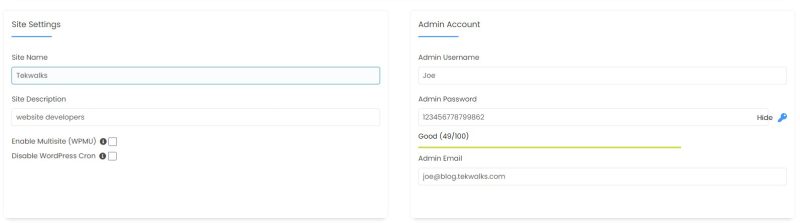
- Site Name: Enter the name of your website.
- Site Description: Provide a brief description of your website.
- Admin Username/Password: Choose a secure username and password for your WordPress admin account. These credentials will be used to log in to the WordPress dashboard.
Step 5: Add database information and Complete the Installation
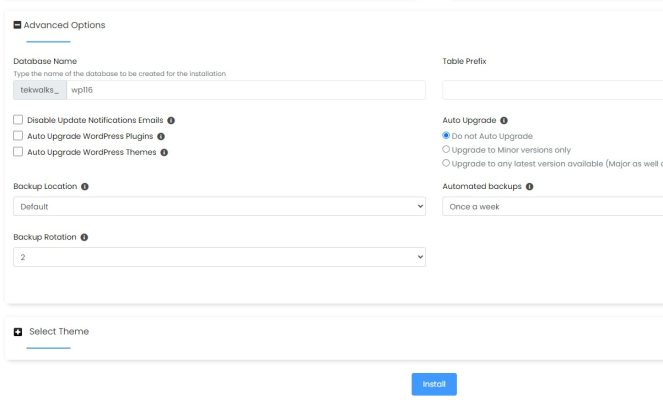
Go to advanced Options and add the database name and database prefix as you configure the backup rotation period
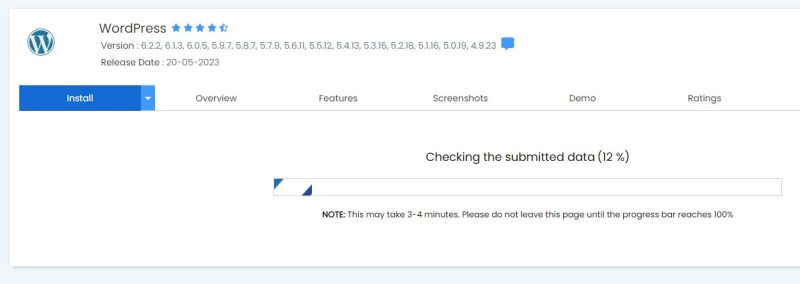
Therefore, after configuring the settings, click on the “Install” or “Finish” button to start the installation process. The installer will automatically create a new database for your WordPress installation and set up the necessary files. Wait for the process to complete.
Step 6: Accessing Your WordPress Website
Wait for WordPress to finish installing. Once the installation is finished, you will see a confirmation message indicating the successful installation of WordPress. You can now access your website by clicking on the provided links. The login URL will take you to the WordPress admin dashboard, where you can customize your site’s appearance, create posts and pages, and manage various settings.
Conclusion
However, You have successfully installed WordPress on your website using cPanel. From this point forward, you can explore the extensive features and flexibility offered by WordPress to create a unique and engaging website. Don’t forget to explore themes, plugins, and customization options to make your site truly your own. With WordPress, you’re well on your way to building an online presence that stands out.
Note: The installation process may vary slightly depending on your web hosting provider and the version of cPanel they offer. However, the fundamental steps outlined in this tutorial remain consistent across most installations of cPanel.


Leave a Reply